Release Procedures
This guide assumes that you have cloned jwst, and added a remote named upstream pointing to the central repository:
git remote add upstream https://github.com/spacetelescope/jwst.gitBefore starting the release process, ensure that the latest regression test run for the main / master branch has passed successfully.
-
Run
towncrier buildwith the desired release version, to build the next changelog entry inCHANGES.rstfrom fragments in thechanges/directory:pip install towncrier towncrier build --version 0.16.1
-
Update the
Software vs DMS build version mapsection ofREADME.mdto show the latest release version, date, and theCRDS_CONTEXTthis release is being currently tested with (this is usually the current operational context:crds list --operational-context). -
Update the release version and date in
CITATION.cff, and add any new contributors. -
Make sure dependencies in
pyproject.tomlare updated. In particular, ensure thatcrds,stcal,stdatamodels, andstpipeinclude their newest tested versions, and exclude any older versions with incompatible API.
Important
If stcal and stdatamodels have new updates that change the API used by jwst, make sure to use the relevant reference files on Artifactory when testing.
Caution
PyPI will reject any submission with Git dependencies in its metadata (i.e. git+https://github.com/spacetelescope/stcal.git@main). Dependencies must be defined against a released version available on PyPI (i.e. stcal>=1.5.0).
-
Update the
requirements-sdp.txtfile, as per its commented instructions. -
Commit your changes, make a PR, and merge to
main/masteronspacetelescope/jwst.
If this release is a cherry-picked patch to an release branch, make the changes on the master branch first, then cherry-pick and modify as needed over to the release branch.
If you're making a major or minor version release, then the release branch will not yet exist. If you're releasing a patch version, then a release branch will already exist. Select one of the next two sections accordingly.
-
Fetch and checkout the upstream
main/master:git fetch --all --tags git checkout -t upstream/master
-
Inspect the log to ensure that no commits have snuck in since your change log update:
git log
-
Create a new release branch. The name of the release branch should share the major and minor version of your release version, but the patch version should be
x. For example, when releasing1.8.0, name the branchrelease/1.8.x.
git checkout -b release/a.b.x- Push the branch to the upstream remote:
git push -u upstream HEAD
In the case of a patch release, the release branch will already exist.
-
Checkout and freshen release branch (this assumes that your local branch is already tracking
upstream/release/a.b.x):git checkout release/a.b.x git pull
-
Cherry-pick relevant commits from
main/masterthat should be included in the patch release (including the new changelog commit):git cherry-pick ...
Tip
Alternatively, you can pull all changes from master into the release branch:
git fetch upstream
git pull upstream master- Push updates to the upstream remote:
git push upstream HEAD
Warning
If the release branch has diverged from master, you will have to run the regression tests on the release branch and have them pass to be able to do the automated release to DMS (see the DMS release section below for details). Additionally, you should tag main / master with a development tag (i.e. 1.8.9dev) so the locally-installed version shows correctly.
Say a bug needs to be fixed in 0.16.0, and is also present in master.
-
Fix the bug on
masterthrough a PR. Merge it and get the hash of the commit. As an example, let's say the commit hash isf41120e. -
Cherry pick all commits that need to be included in the patch release.
git cherry-pick -x f41120e
-
If there are conflicts, resolve them before you continue with other commits. In general, start with the oldest commit so that conflicts are minimized.
Tip
Sometimes a commit is a merge commit with more than one parent. In that case, the above command will fail with an error message:
error: Commit f41120e is a merge but no -m option was given.
fatal: cherry-pick failed
This discussion might be helpful.
To resolve this, look at the parents of the commit and choose which one is the ancestor:
git cherry-pick -x -m 1 f41120e(this tells git to use the first parent)
- Use
git showto verify which changes are going into the release branch.
The creation or update of the release branch should have triggered a CI job on GitHub actions. Find the latest build on the release branch in the Actions tab:
https://github.com/spacetelescope/jwst/actions/workflows/ci.yml
-
Remove requirements from
requirements-sdp.txt. -
If the commit with the release tag is not on
main/master, you should tag the next commit onmain/masterwith a development tag (i.e. if we just released version1.2.1onrelease/1.2.x, the development tag should be1.2.1.devon themain/mastercommit directly after the divergence). This allowssetuptools-scmto show the correct version when installing the package locally (pip install .).git fetch upstream git checkout upstream/master git tag -a a.b.c.dev -m "development tag after divergence" git push upstream a.b.c.dev
At this point, you should have the release branch checked out and ready to tag.
-
Create an annotated tag with a name that matches your intended release:
git tag -a a.b.crc1 -m "JWST DMS Build x.y rc1" -
Push the new tag to the upstream remote:
git push upstream a.b.crc1
- Create a new
stasisdelivery configuration (.ini) with a new revision number. See the documentation for instructions. Put it on the shared drive, or at a publicly accessible URL. - Run the
Publish Pipelineworkflow, pointing theDelivery filebox either to the path on the shared drive, or to a publicly available URL. - Run the
Index Pipelineworkflow to update the website at https://ssb.stsci.edu/stasis/releases/roman/ - Check https://ssb.stsci.edu/stasis/releases/roman/ to see the newest delivered release.
Tip
To deliver another revision of the same version, increment the meta.rc number in the delivery configuration file (.ini), then re-run the Publish Pipeline and Index Pipeline workflows.
Once DMS has identified a commit as suitable for a final release, you can tag that commit with the final version.
-
Create an annotated tag with a name that matches your intended release:
git tag -a a.b.c -m "JWST DMS Build x.y" -
Push the new tag to the upstream remote:
git push upstream a.b.c
-
Click Draft a new release.
-
Select the existing tag that you just created and pushed, and title the release
JWST Build x.y rcN, whereNis the current release candidate for DMS (we can always remove thercNpart from the title later if this turns out to be the final release). -
Publishthe release.
Publishing the GitHub release should trigger an automated workflow that should build the wheel and source distribution and publish the package to PyPI.
After this workflow completes, you can confirm that the new release appears on PyPI: https://pypi.org/project/jwst/#history
Additionally, you can test installing the new version with pip:
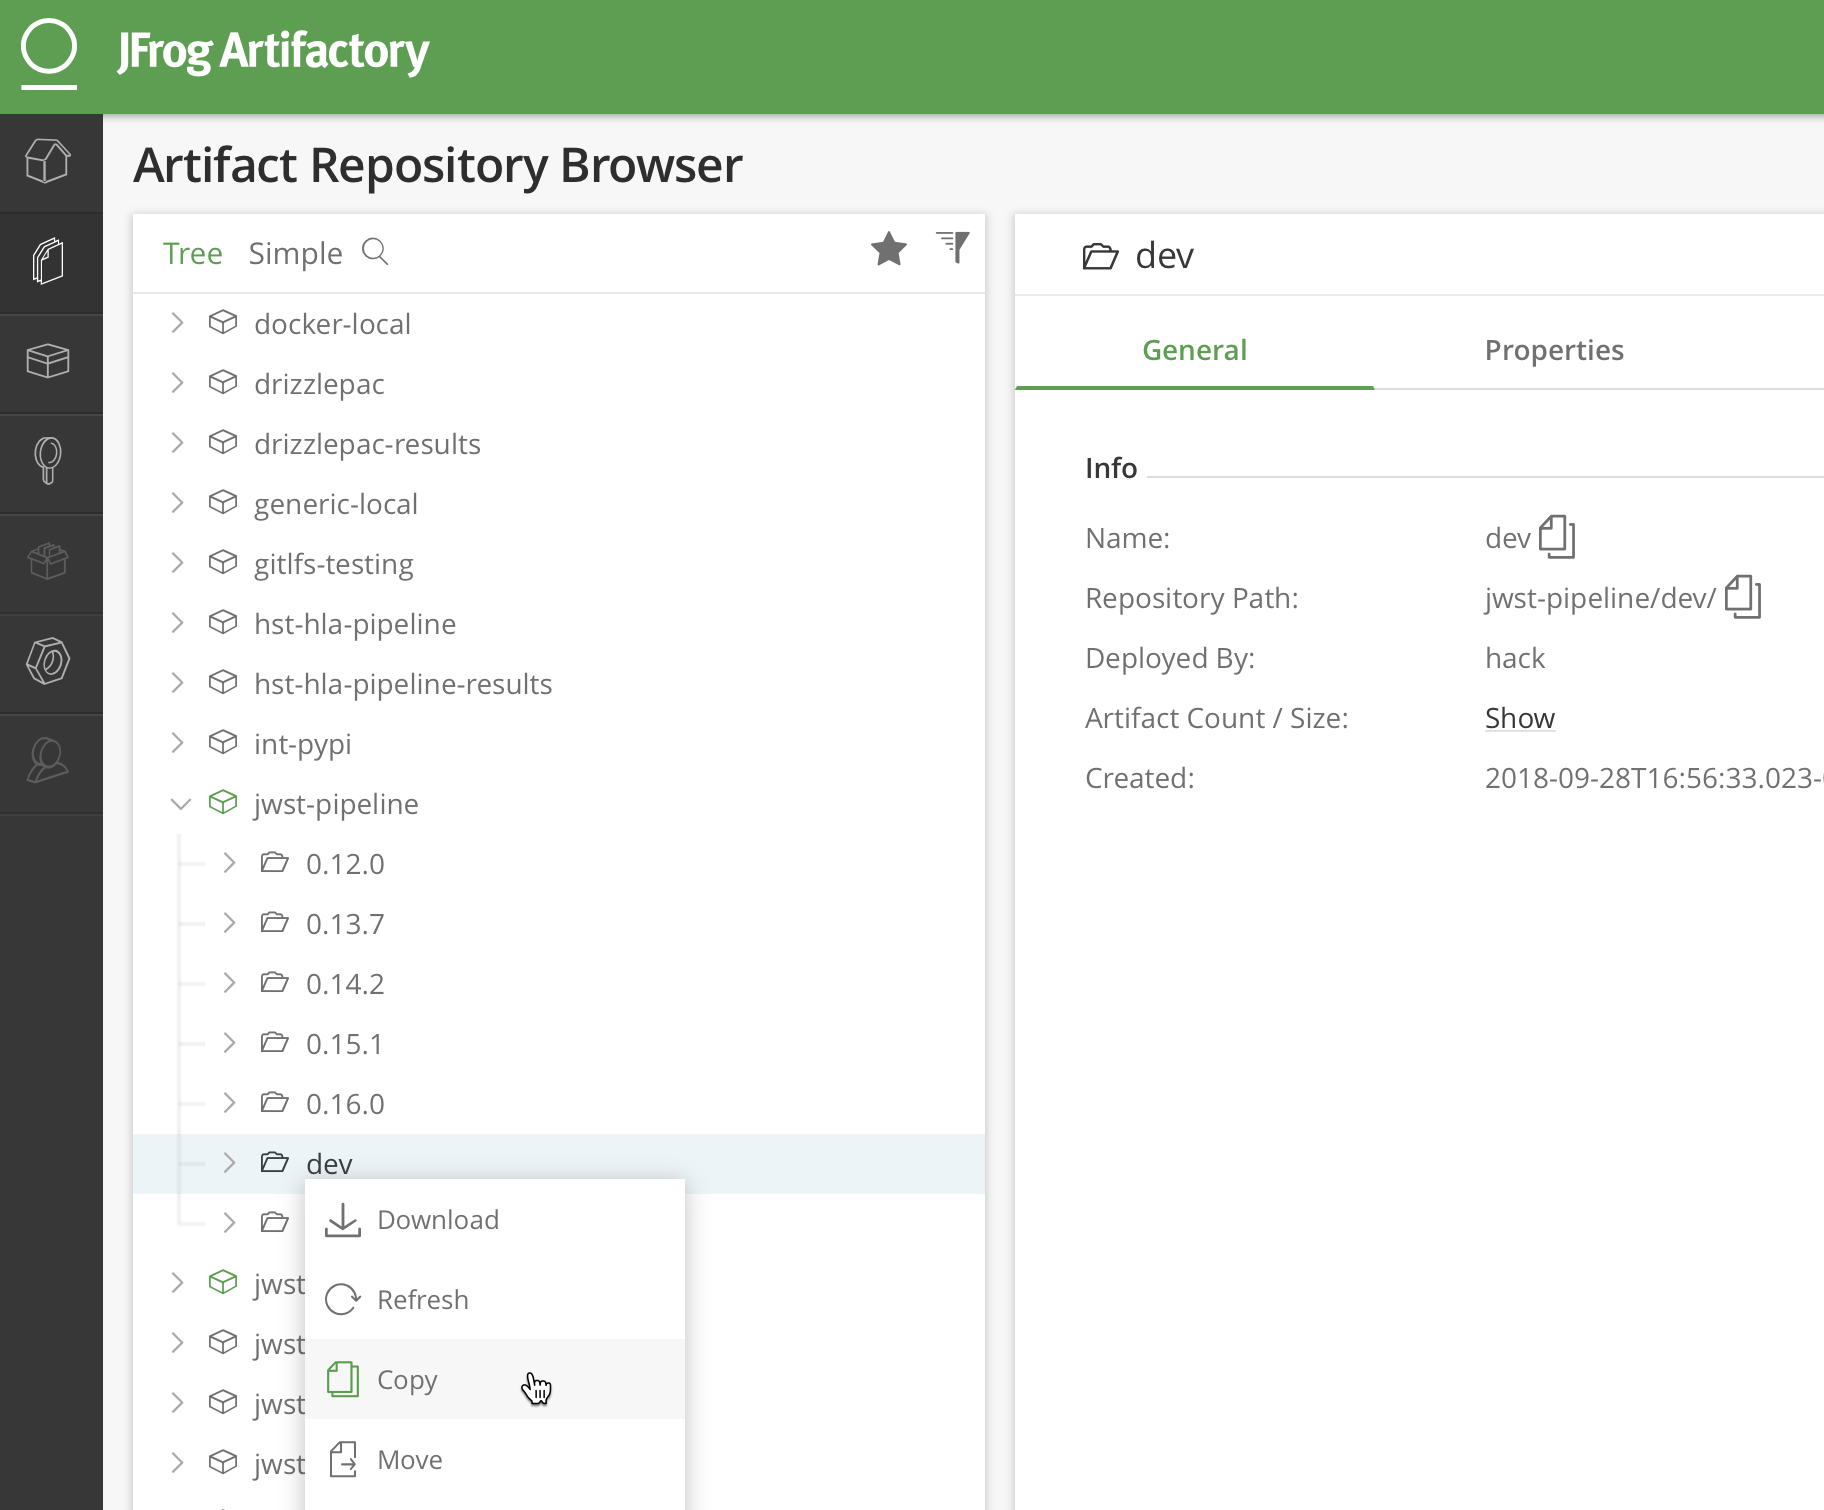
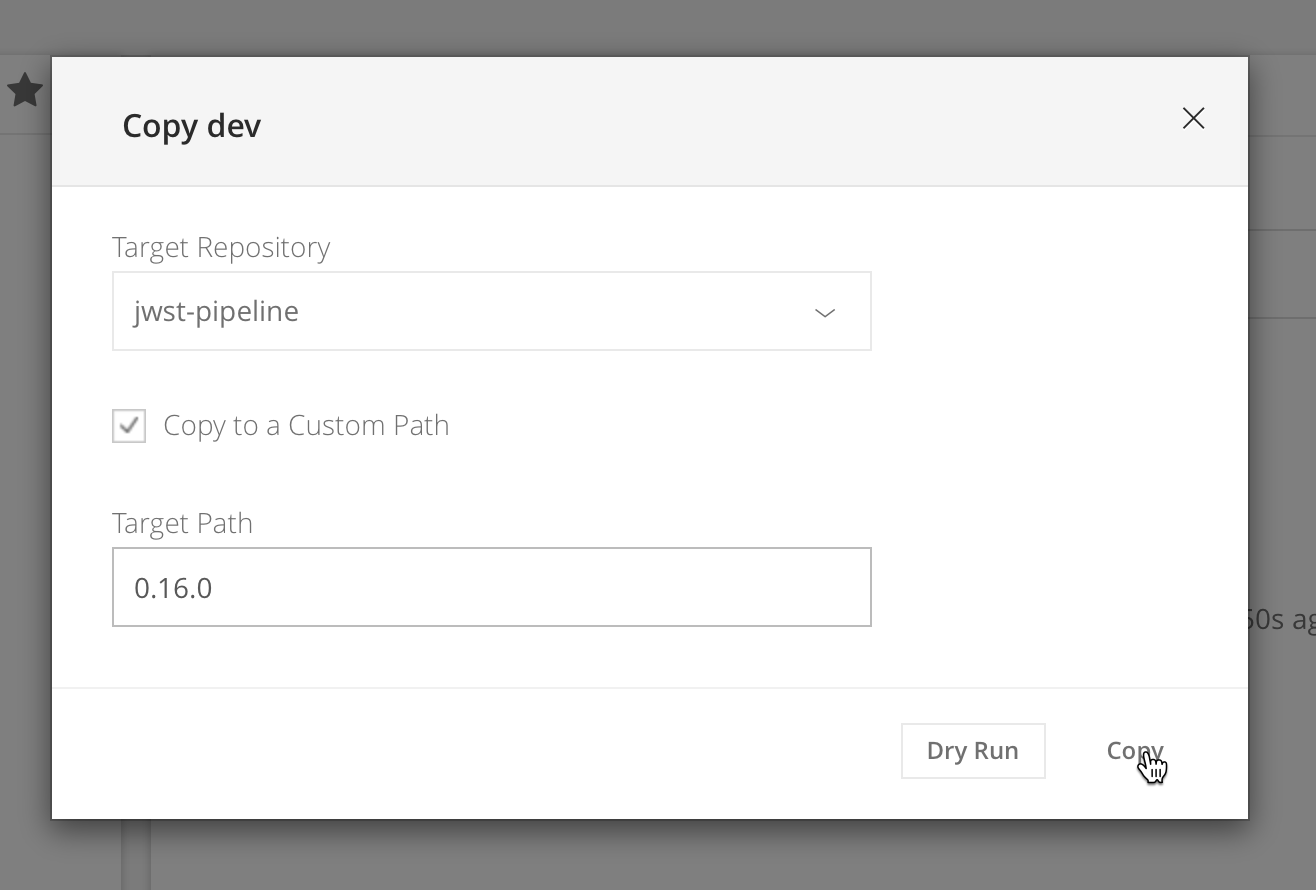
pip install jwst==a.b.cGo to the Artifactory web interface and copy the passing test input and truth data from
jwst-pipeline/dev
to a new directory named the same as the release tag
jwst-pipeline/a.b.c
CRDS maintains a reference file, CALVER, and metadata that are tied to JWST software releases. Review the two substeps that are part of the CRDS S/W Release Process. If either require updates due to a JWST release, file a CCD issue to update CRDS as needed.
The two subseps are: