This guide will help you:
-
Run a WebSphere Liberty Docker container on Bluemix with remote administration enabled.
-
Connect Eclipse to the Liberty container
-
Start developing in Eclipse and watch your container instantly pick up changes.
git clone <THIS REPO URL>
cd LibertyIBMContainers

# If you want to change the username and password for remote admin (recommended), you can edit remote.xml

# Prereq: Install cf, cf ic extension and log in to cf.
# Build docker image on IBM Containers using the Dockerfile in this folder.
cf ic build -t rliberty .

# Identify the image created and note the name
cf ic images

# Run the container
# Replace "registry.ng.bluemix.net/rvennamdocker/rliberty" with your own image name.
cf ic run --name rserver -p 9080:9080 -p 9443:9443 -d -t registry.ng.bluemix.net/rvennamdocker/rliberty

# Acquire a Public IP. Note this IP for later
cf ic ip request

# Bind that IP address to the container
cf ic ip bind <public_IP_address> rserverConfirm that you have a recent version of Eclipse with the WDT plugin.
-
Set up a local Liberty server as outlined here: https://developer.ibm.com/wasdev/downloads/liberty-profile-using-eclipse/
-
Now, we'll create a remote Liberty server.
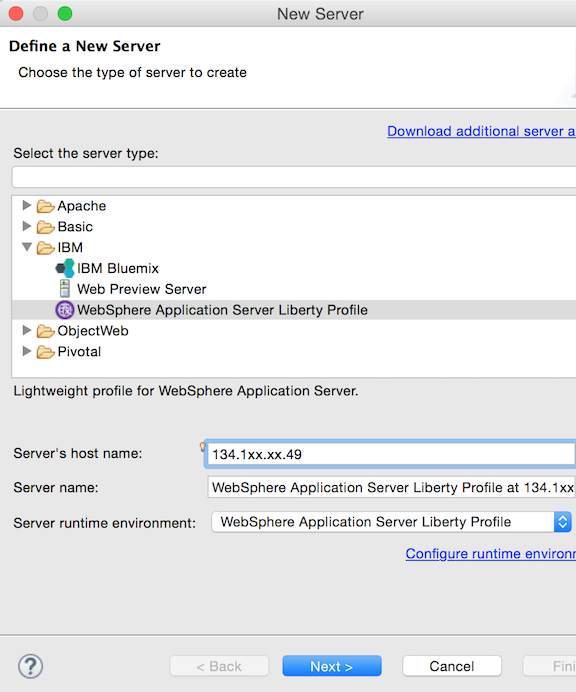
In the Servers view of Eclipse, right-click to create a new Liberty server. Select Liberty and fill the hostname with the Public IP of your Bluemix Container that you noted above.
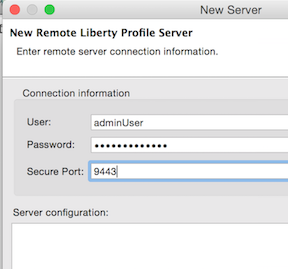
Fill in the credentials. The default User is adminUser, Password is adminPassword and the Port 9443. These were defined in the server configuration in the previous section.
- Click Verify and Finish!
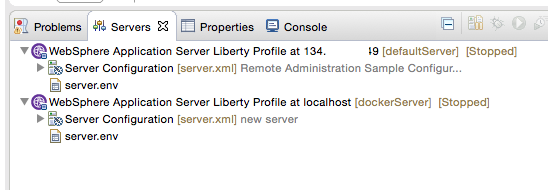
Your Eclipse workspace should now be connected to your Liberty docker container on Bluemix.
You're ready to start deploying applications to this Server. As you update your code, Eclipse will instantly push changes to your container.
-
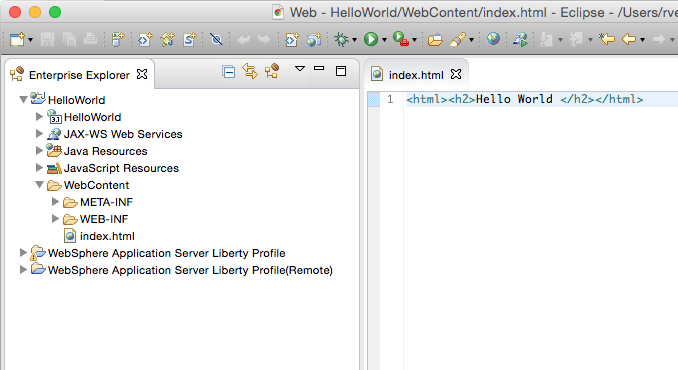
In Eclipse File -> New -> Dynamic Web Project. Enter
HelloWorldfor the name and uncheck 'Add Project to an EAR' -
Open the project and create a new file called 'index.html' under WebContent folder
-
Add some html to this file
<html><h2>Hello World!</h2></html>and Save
- Right click on your remote server -> Add and Remote, and deploy the HelloWorld project.
You should be able to access your application by going to http://<PUBLIC_IP>:9080/HelloWorld
- Start making more changes to index.html and watch your application update.
Happy coding!