A portable Network-Attached Storage (NAS) built using a Raspberry-Pi 3. This project allows you to carry your media library and files wherever you go, with the ability to create a wireless hotspot for easy access and streaming.
- 🎒 Portable Storage: Access your files and media on the go.
- 📶 Wireless Hotspot: The Raspberry-Pi automatically creates a Wi-Fi hotspot for seamless connectivity.
- 🎥 Media Streaming: Stream movies, music, and more from your NAS to any connected device.
- 🔋 Low Power Consumption: Efficient power usage, making it ideal for mobile use.
- Raspberry-Pi 3
- MicroSD card (16GB or larger)
- Micro-SD card Reader
- External storage (USB drive or HDD/SSD)
- Power supply for your Raspberry-Pi
- Portable power bank for true mobility (OPTIONAL)
- Raspberry Pi Imager
-
SD-Card Setup:
-
Format your Micro SD-Card with the SD-Card Formatter
-
Install Raspberry-Pi Imager on your system.
-
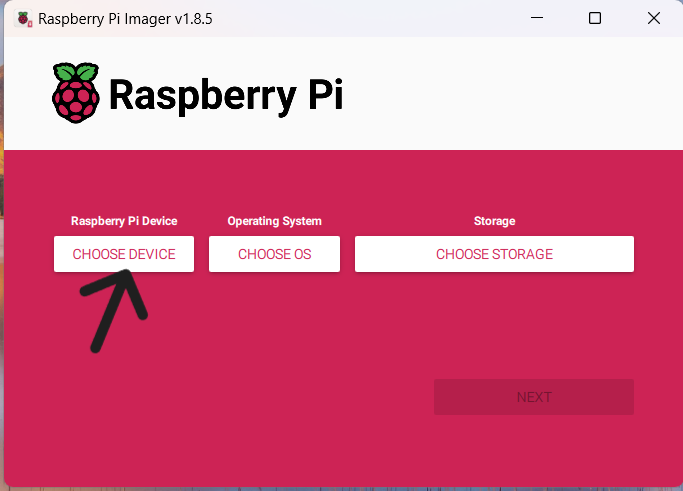
Boot the Raspberry-Pi Imager.
-
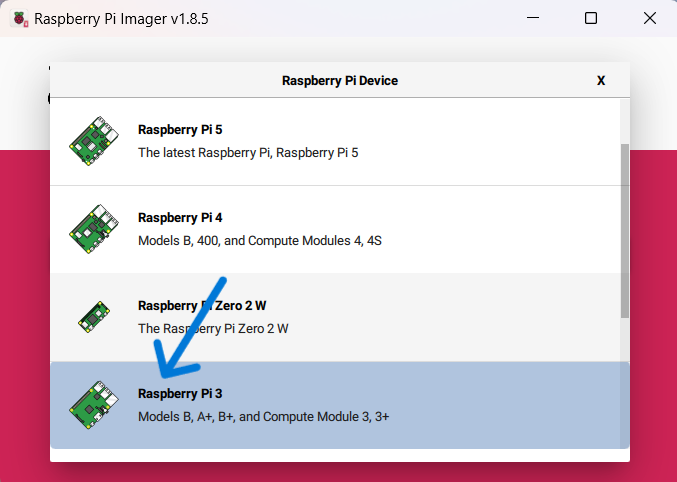
Select your Raspberry Pi Device. For me it was
RaspberryPi-3 Model-B -
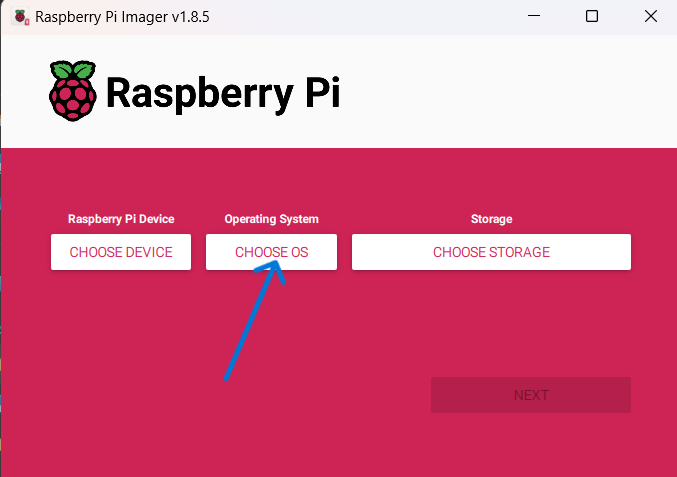
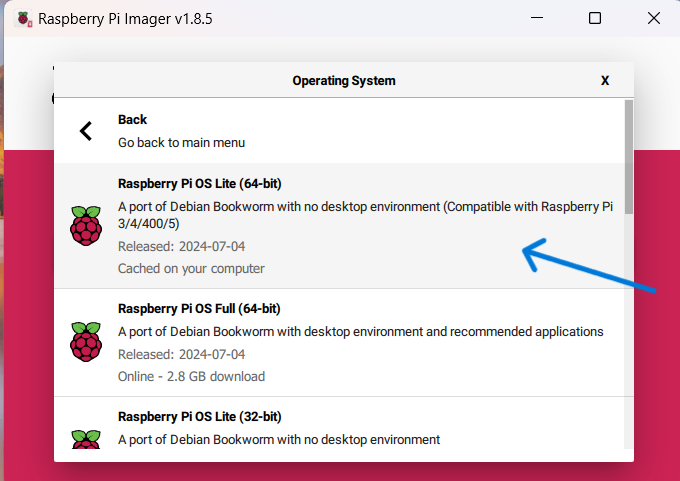
Select your Operating System (OS) (Most Prefered is
Raspberry Pi OS Lite 64-bits) -
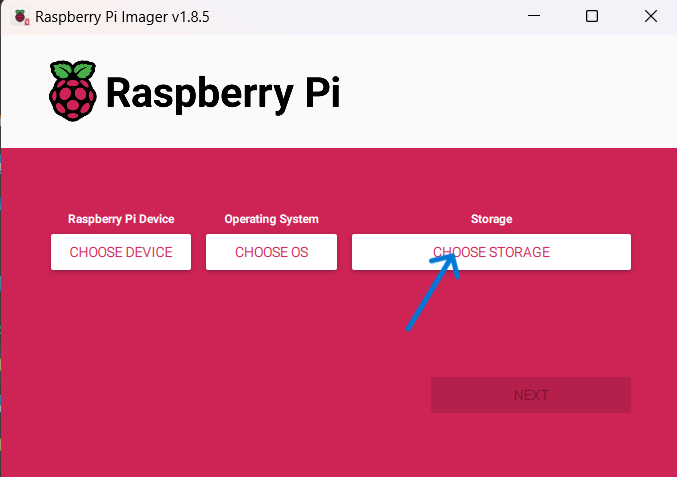
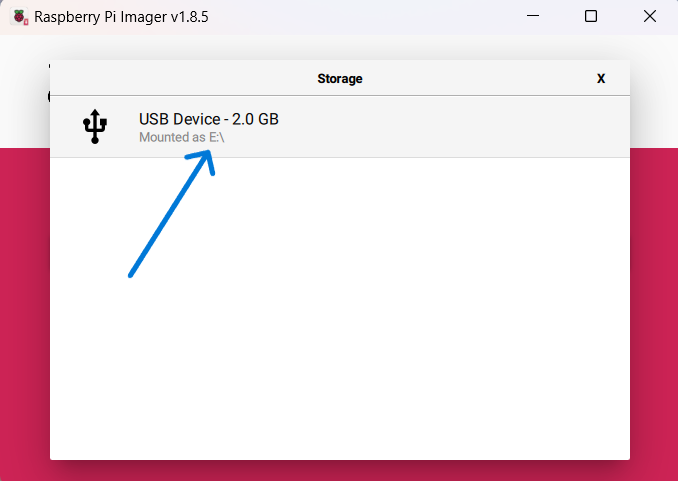
Select a storage device i.e your Micro SD-Card
Warning!!!
Be sure not to format any other drive, that may contain your important data -
Click on
NEXT, and openEdit settings -
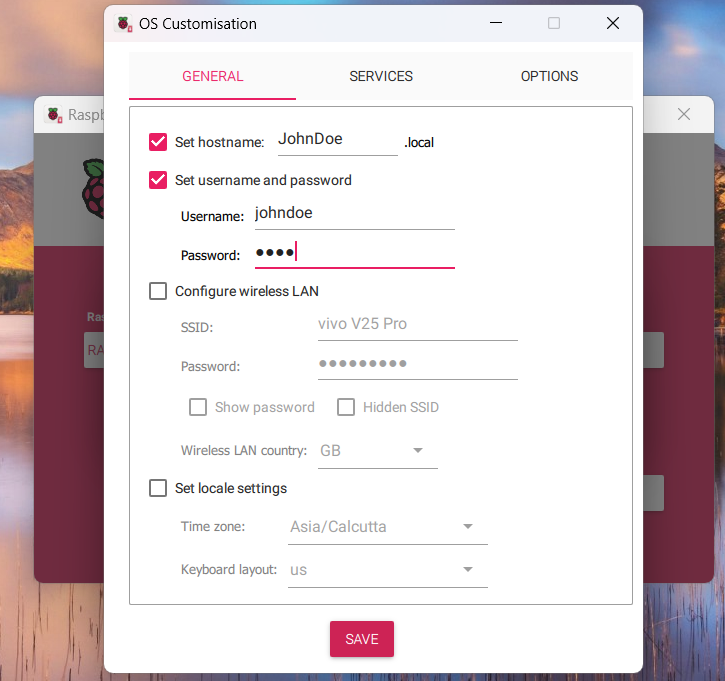
Enter your login
usernameandpassword -
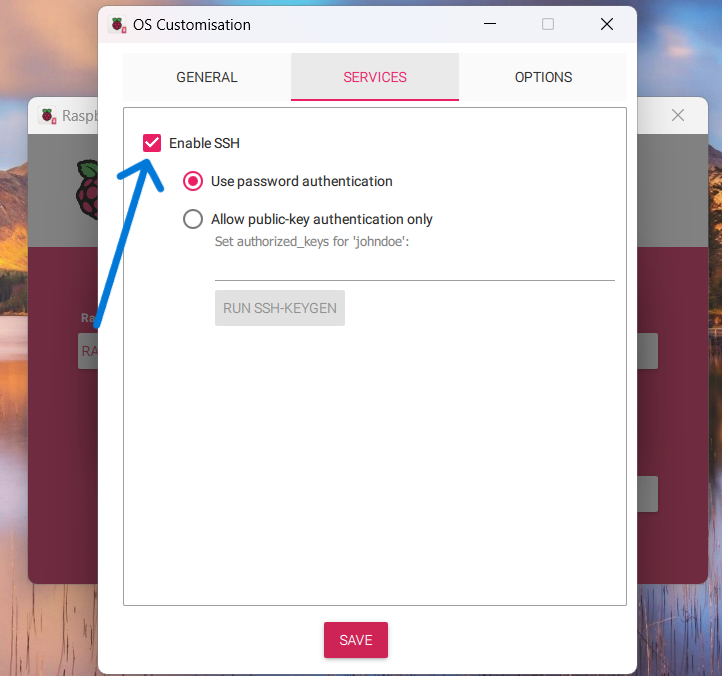
Go to
SERVICESsection and clickEnable SSH. Now click onSAVE -
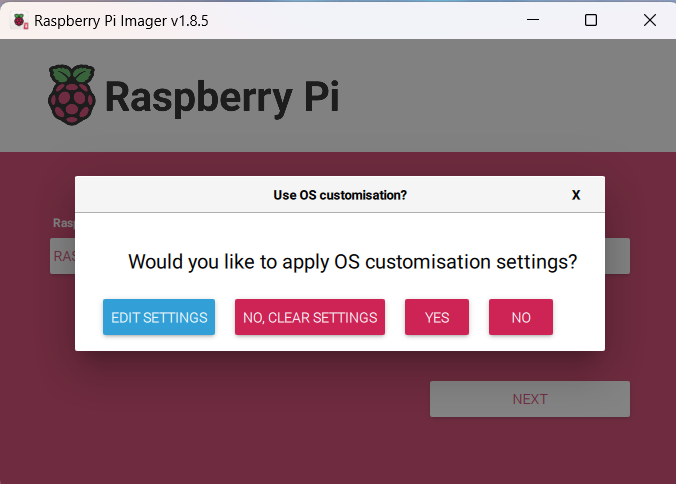
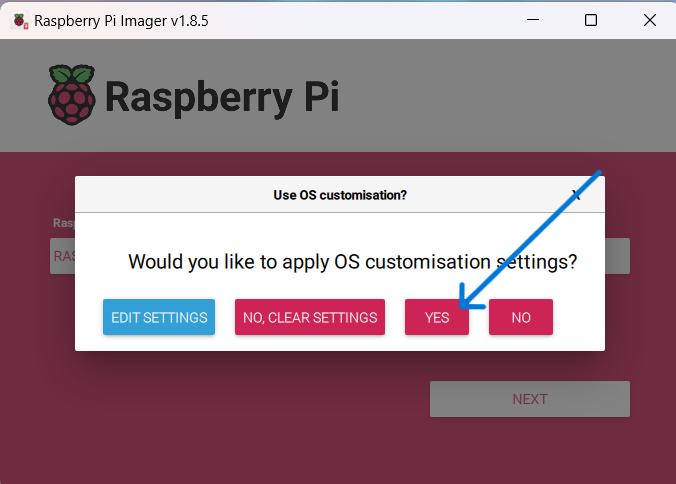
Now click on
YES, and let the Raspberry Image be written on your Micro SD-Card
Now wait for the image to flashj into your SD-card.
-
-
Raspberry-Pi Setup
-
Once the above setup is done, take you micro SD-card from the card-reader and insert it into the micro SD-card slot in your Raspberry-Pi.
-
Connect the following peripherals to your Raspberry Pi:
- Keyboard
Only to check the IP address of the RaspberryPi - HDMI Cable
Only to check the IP address of the RaspberryPi - Ethernet Cable
- Power Cable
- External Storage
- Keyboard
NOTE: IF YOU ALREADY KNOW THE IP-ADDRESS OF YOUR PI, THEN YOU CAN SKIP TO STEP-6
-
Now let you Pi boot up. The RaspberryPi may reboot several times on it's first boot. Make sure to give it some time, until you see the terminal.
-
Enter the
usernameandpasswordthat you had set here.
- Once logged in, enter the following command
ifconfig
You should be able to see the IP address in format
192.xxx.xx.xx- Now open the terminal (
cmd,pwsh,powershell, or any other terminal) of your laptop/PC and run the following command after replace<USERNAME>&<IP-ADDRESS>with the username & password of your Raspberry Pi.
ssh <USERNAME>@<IP-ADDRESS>
Enter the password.
NOTE: This command will only work if your laptop/pc and your Raspberry Pi is connected to the same network.
- Once you are into the terminal of your Pi, enter the following commands
sudo apt install nala -y sudo nala update && sudo nala upgrade -y- Now, we install
OpenMediaVaultinto the RaspberryPi
sudo wget -O - https://raw.githubusercontent.com/OpenMediaVault-Plugin-Developers/installScript/master/install | sudo bashNOTE:
-
You may get disconnected from the SSH session when you enter the above command and the IP address of your Pi may also change. So be sure to check the new IP-address before proceeding.
-
If you are trying to go
WIRELESSor trying to useWi-Fi, theOpenMediaVaultdeletes theNetwork-Managerof your Pi once it is installed. So make sure that you install it back with the command
sudo nala install network-manager && sudo nala update -
-
OpenMediaVault SETUP :
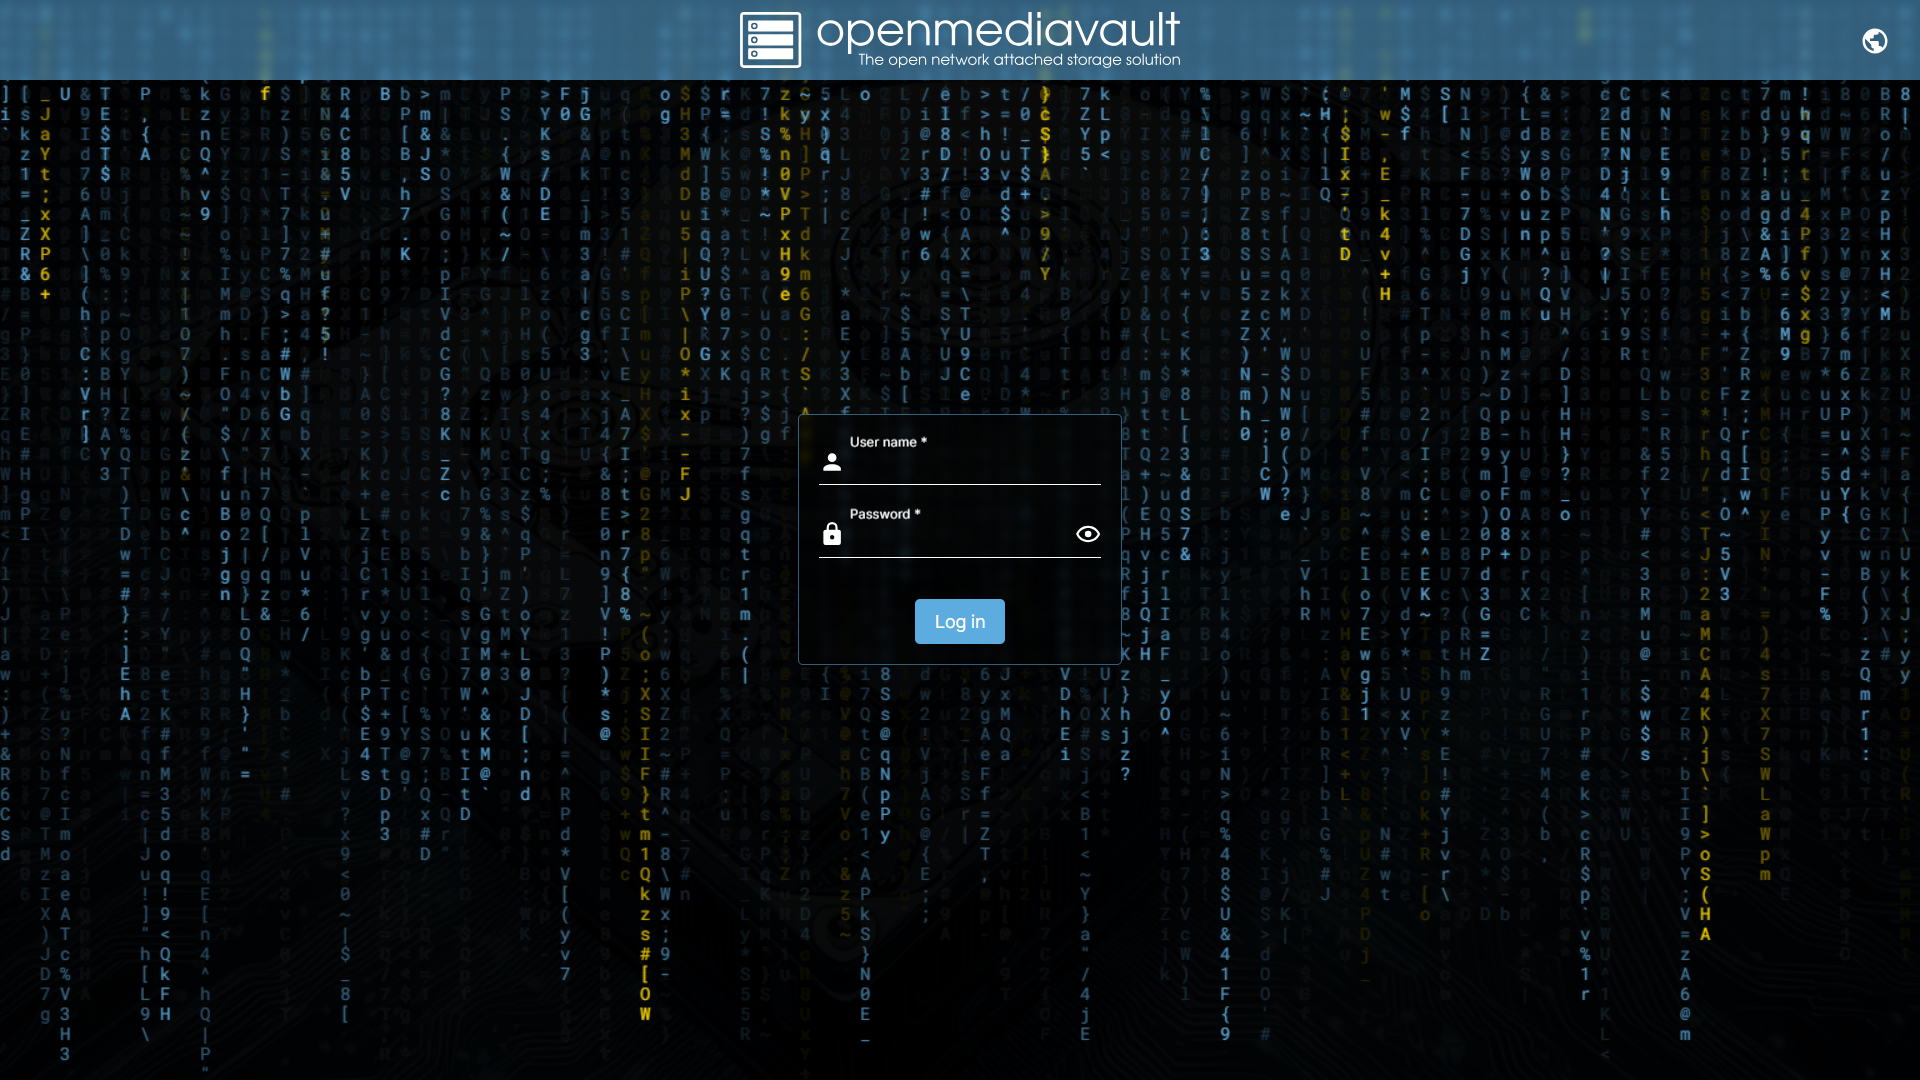
- Open your preferred Web-Browser on your laptop/PC and enter the IP-address of your Pi in the search bar. This should open up the
Open Media Vaultlogin page. It should look something like this, or it may change with time.
-
Enter your
usernameandpassword.
The default username isadminand the password should beopenmediavault -
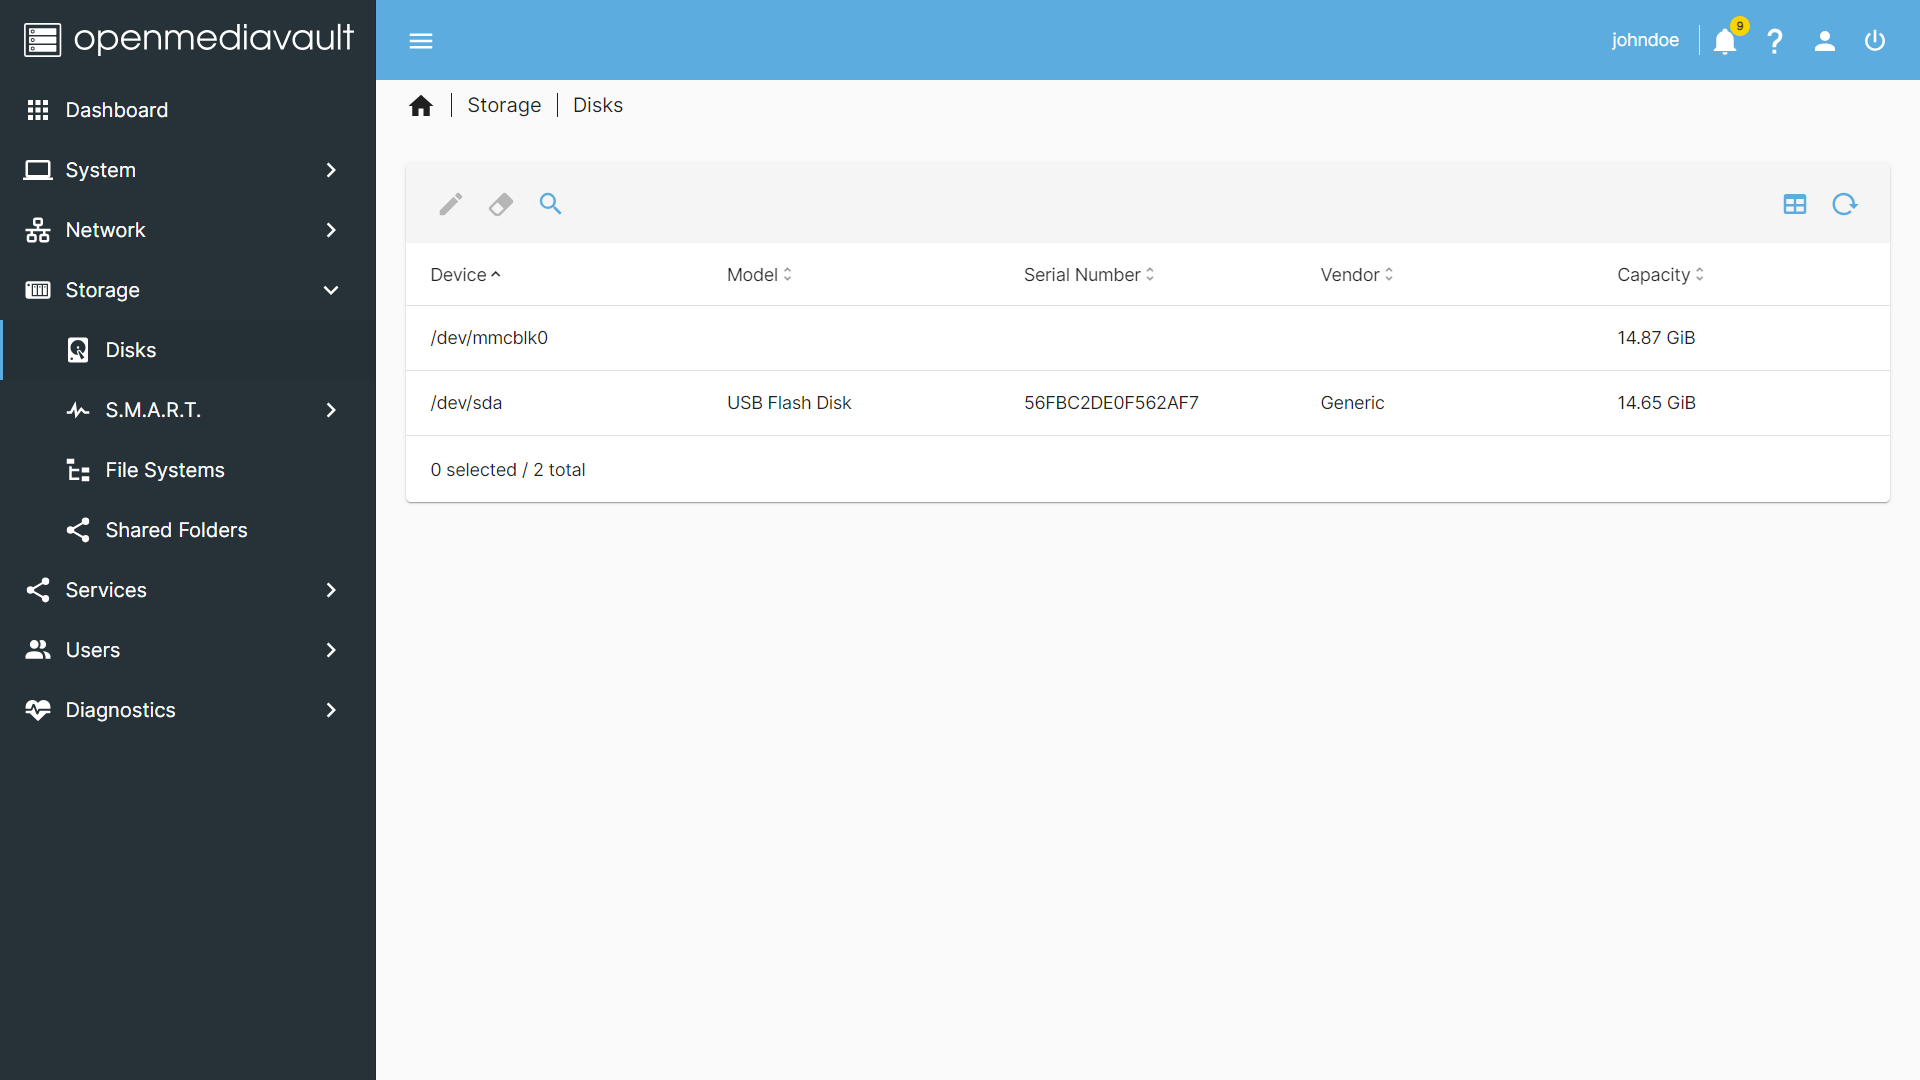
Now, under
Storageclick onDisks. This should show you the storage devices that are connected to your Pi. Click on you storage and format the disk by clickingWipeoption. Be sure to transfer the important data from your drive.
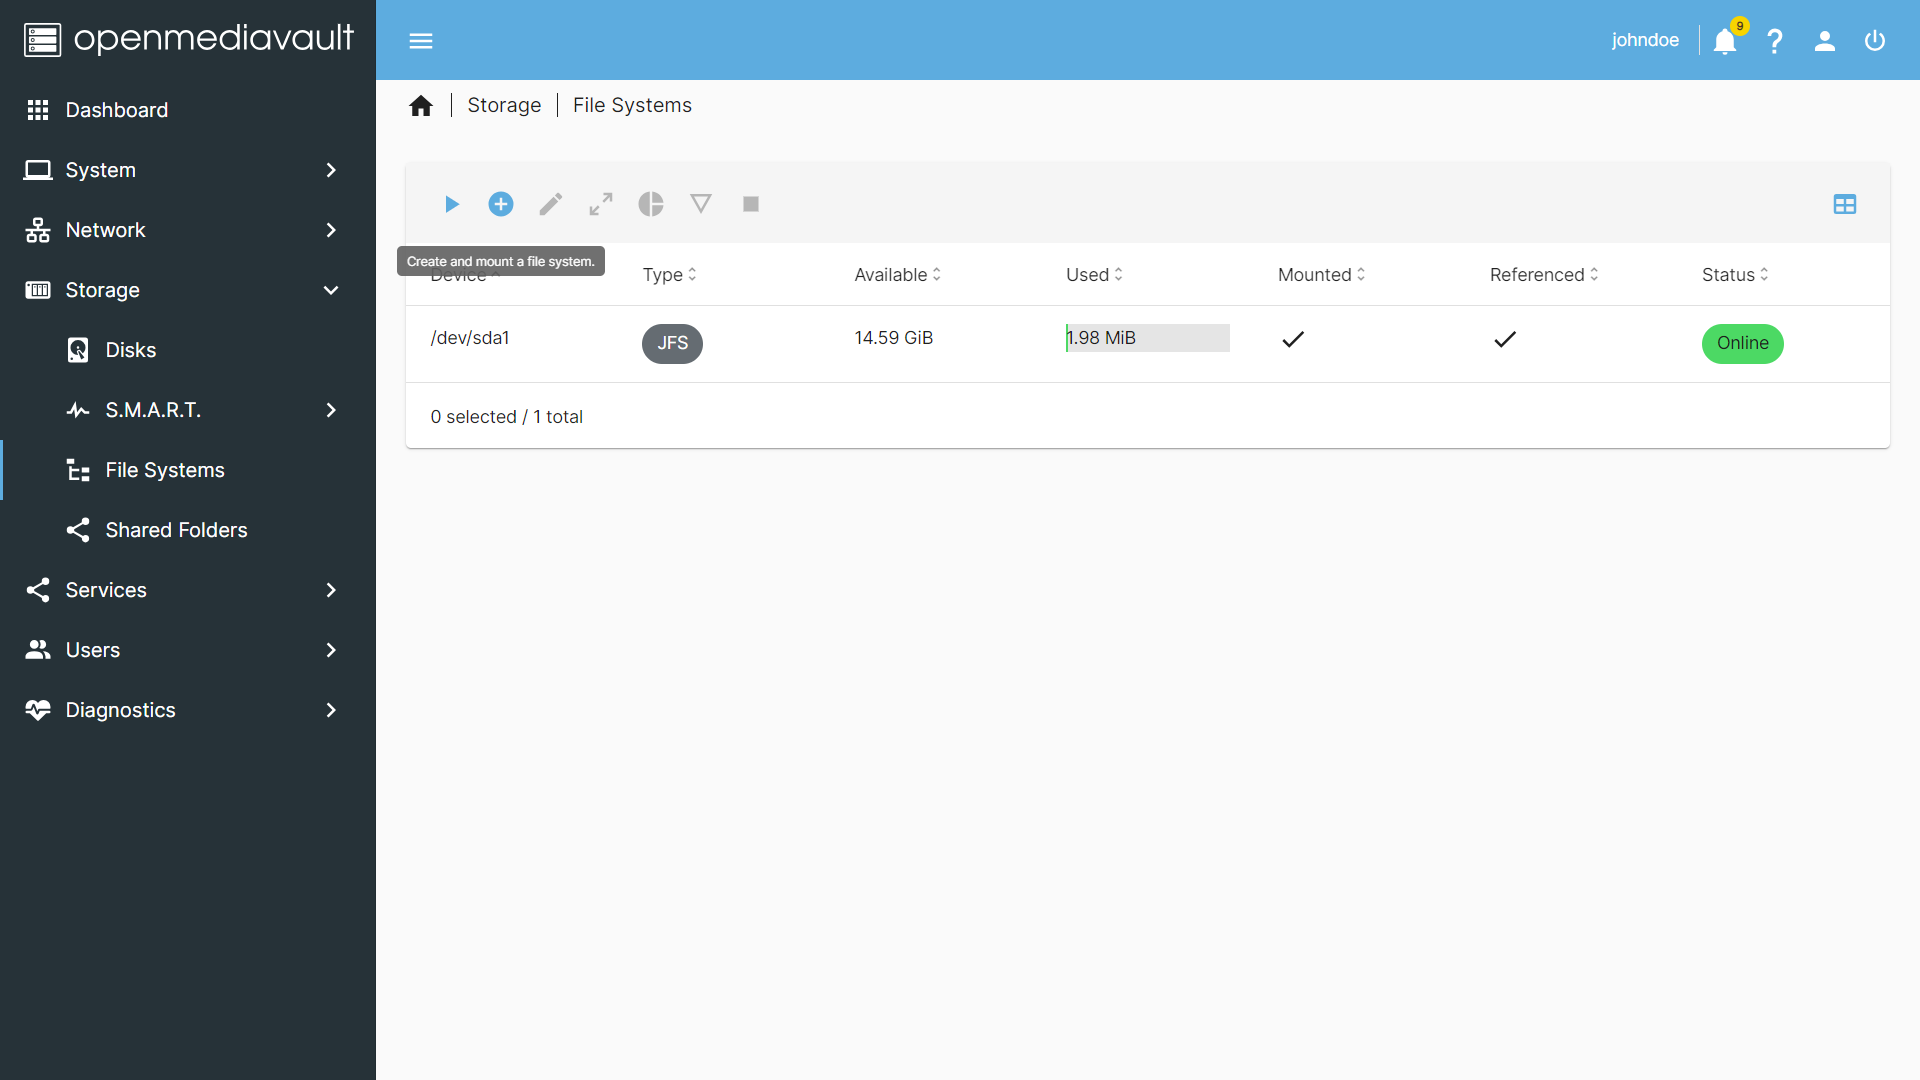
- Open
File SystemsunderStorage,and create a new storage, and be sure toMountit.
-
Now go to
Shared Folders, and create a new shared folder and naming it is upto you. I'll be refering the shared folder asNasty. -
Once that's done, select Nasty, and then head to
Priviledgesin the navbar of the page (NOT THE SIDEBAR). GiveRead & Writepermission to the user. Now click onApplyat the top right corner. -
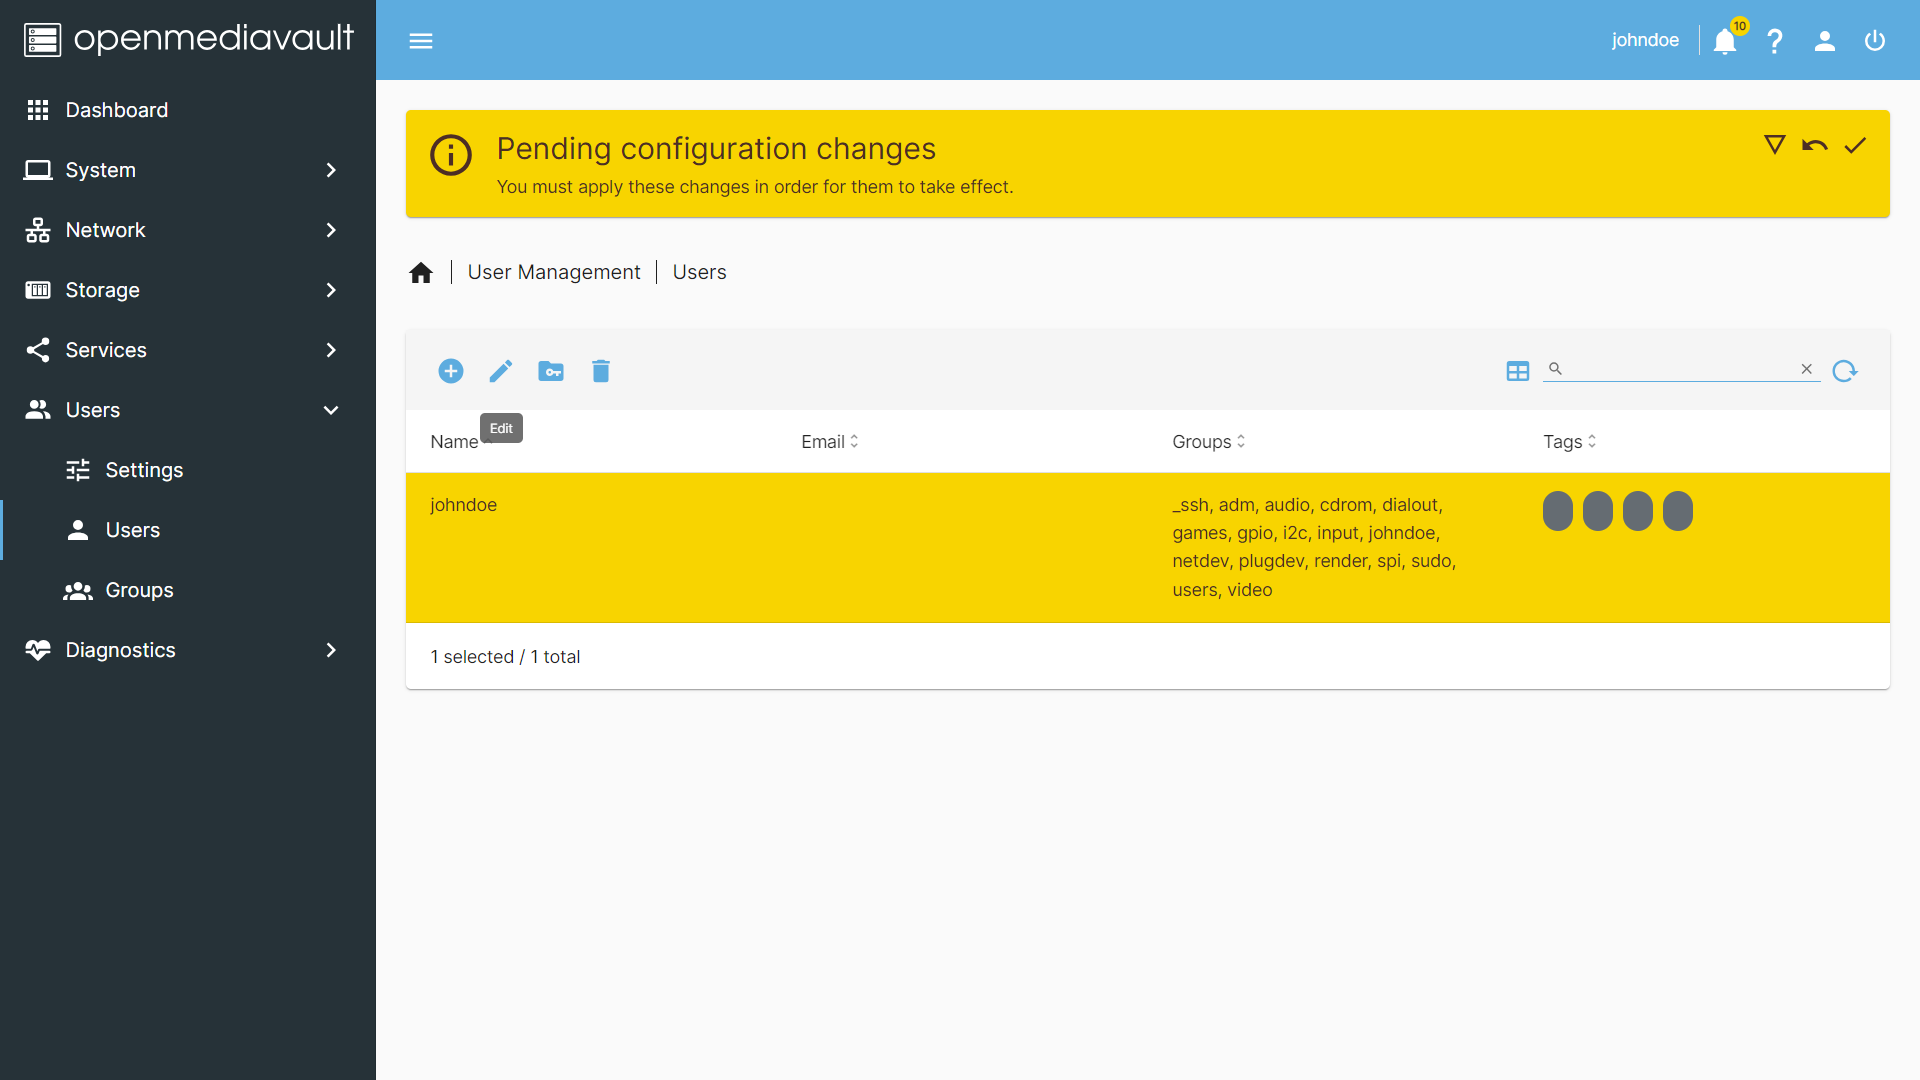
Now go to
Usersand create a new user. Be sure to change its password.
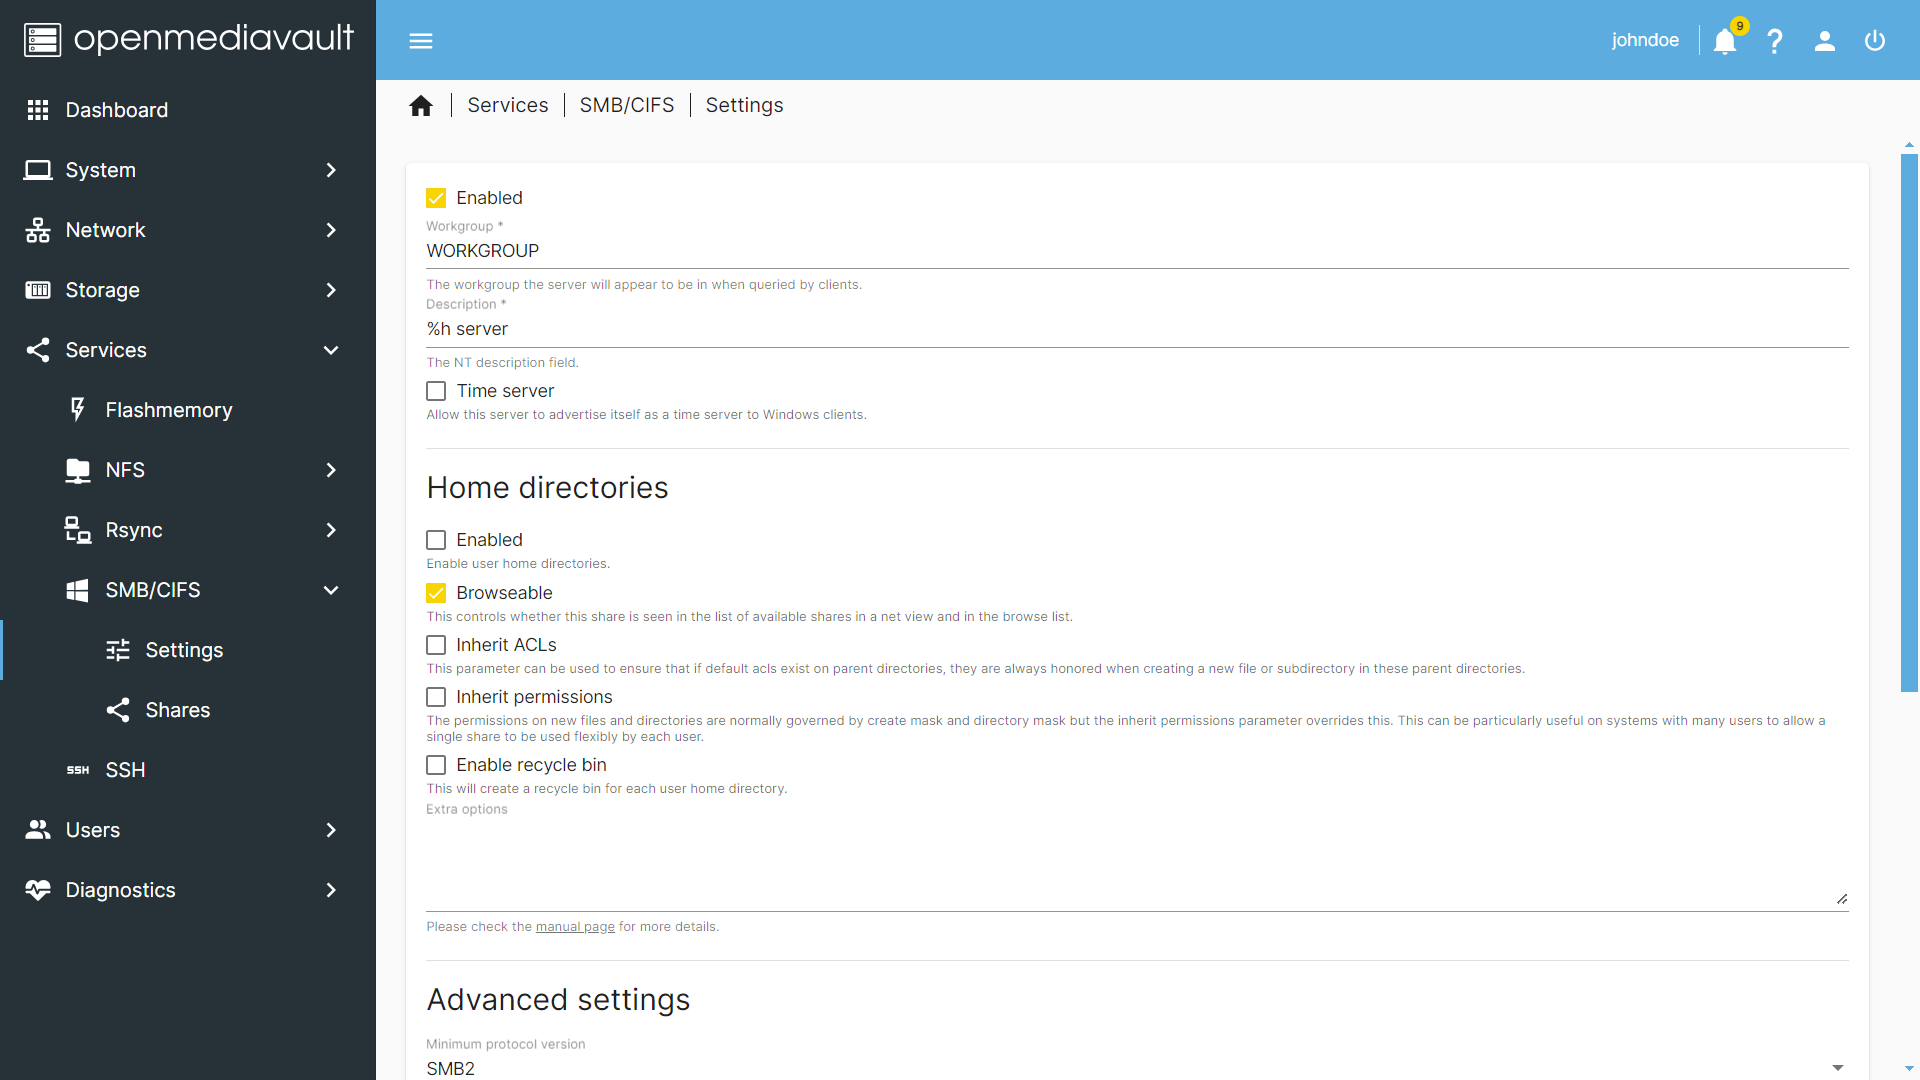
- Under
Services, go to SMB (for Windows) andEnableit
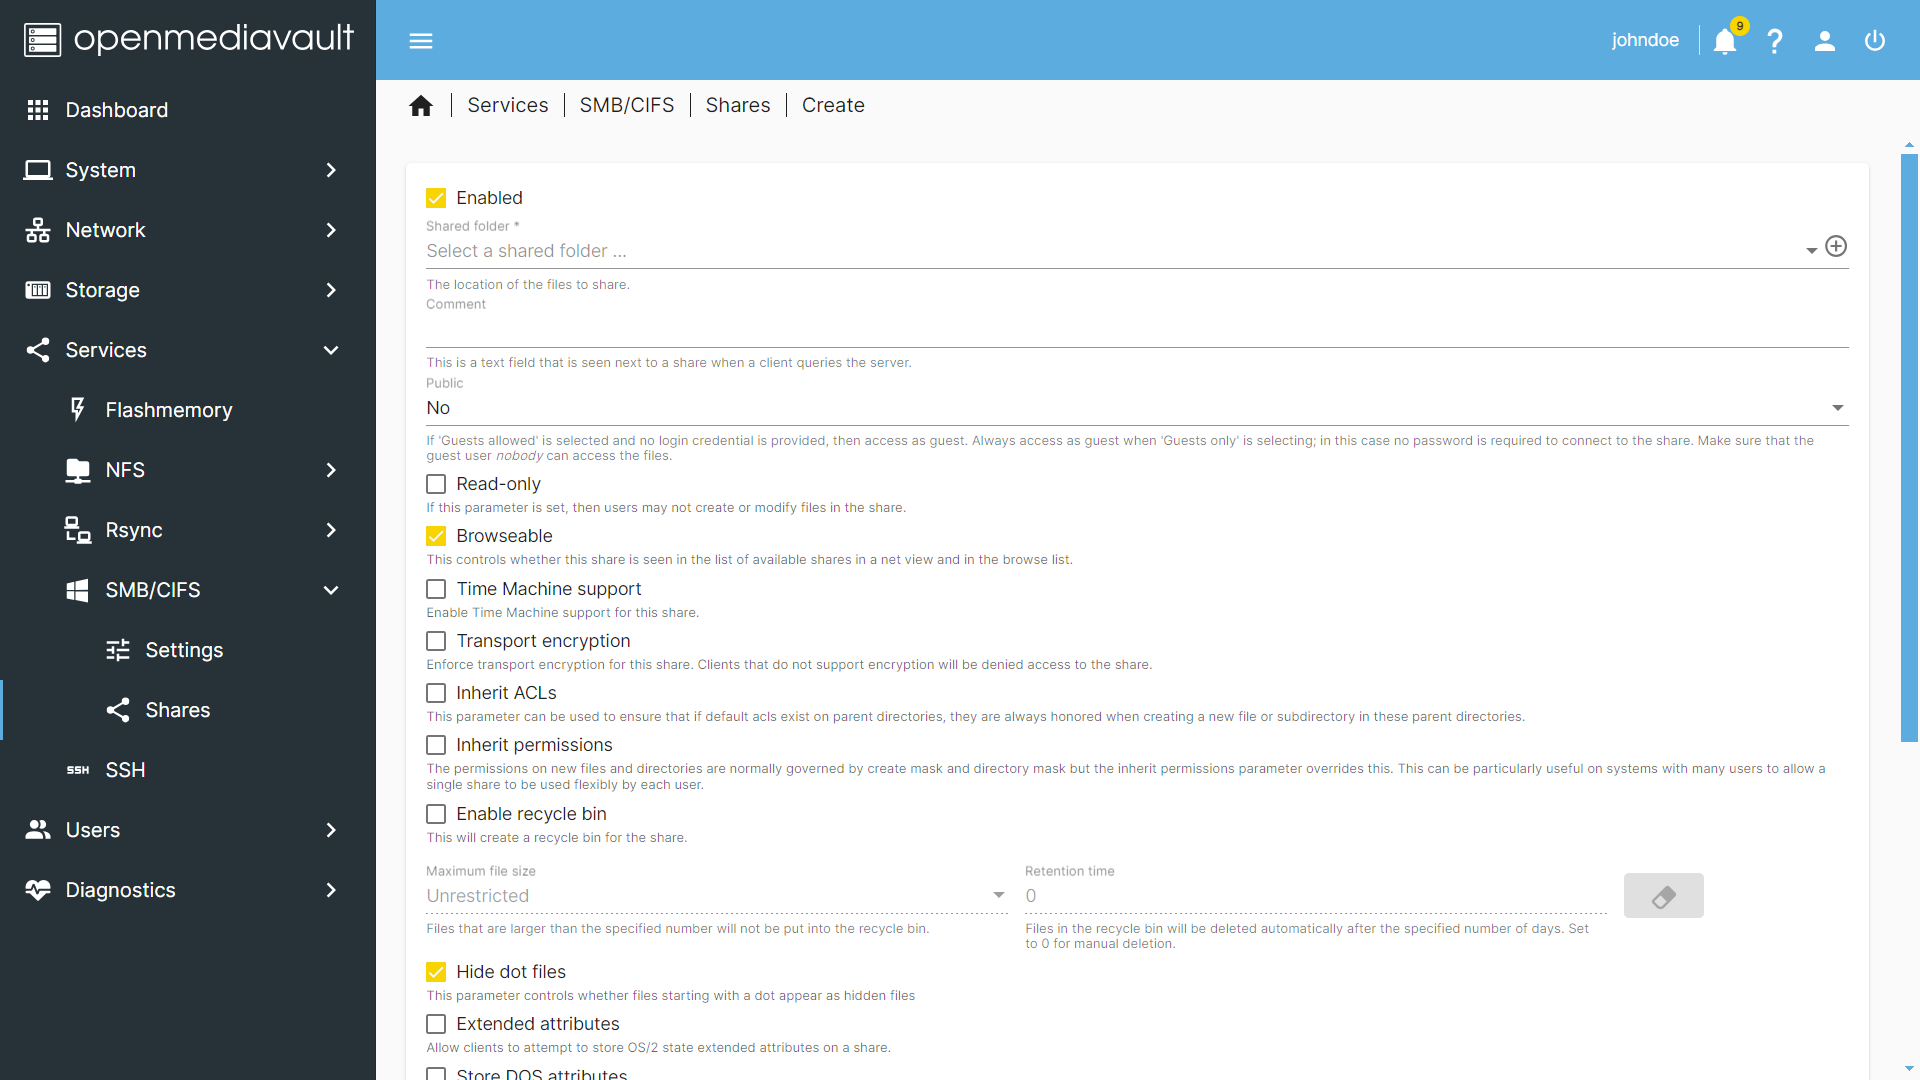
- Under
SMB, go toSharesand add Nasty there.
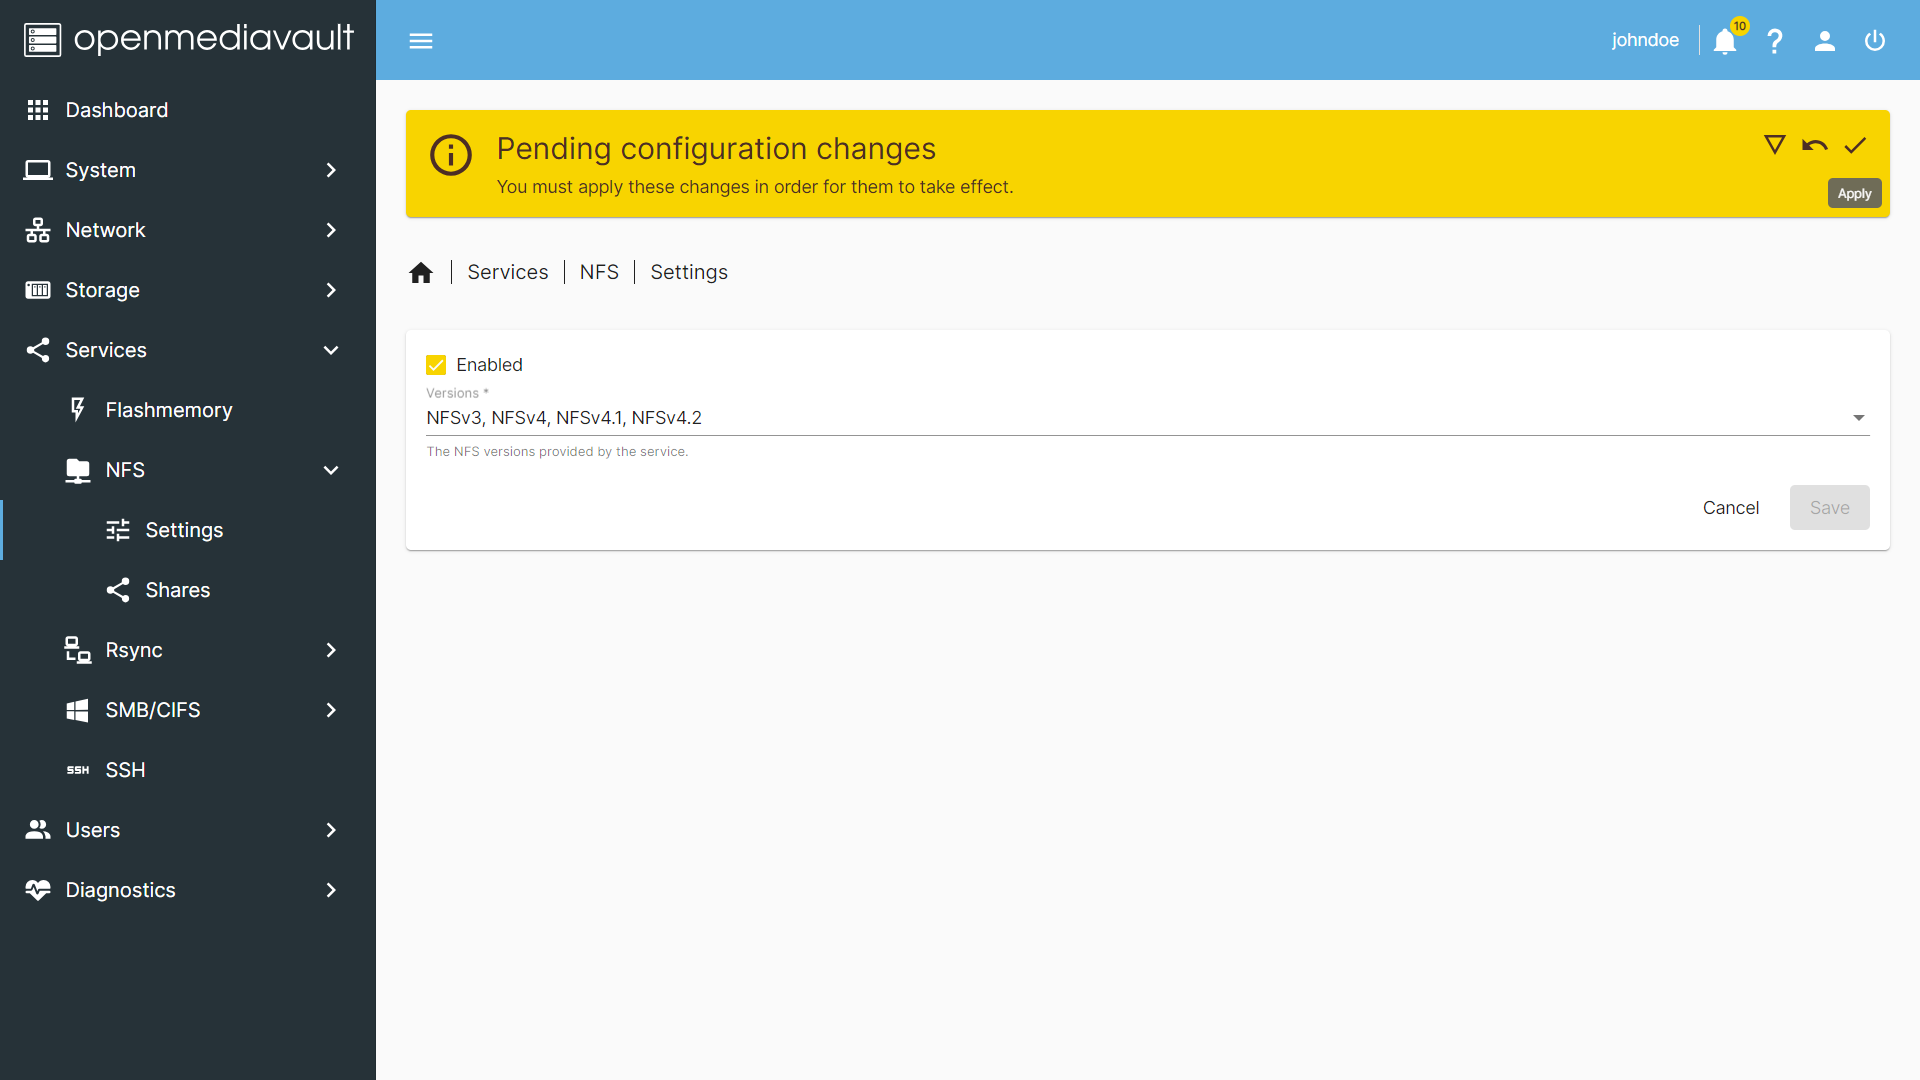
- Now go to
NFS(for Linux/MacOS) andEnableit and repeat the same steps for theSharesoption underNFS. Be sure to apply the changes.
- Open your preferred Web-Browser on your laptop/PC and enter the IP-address of your Pi in the search bar. This should open up the
-
Explorer SETUP
- Open your
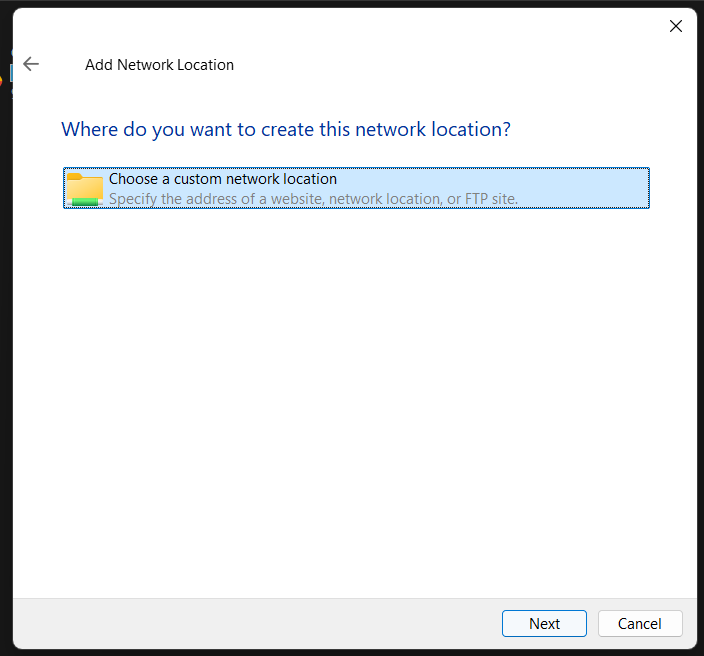
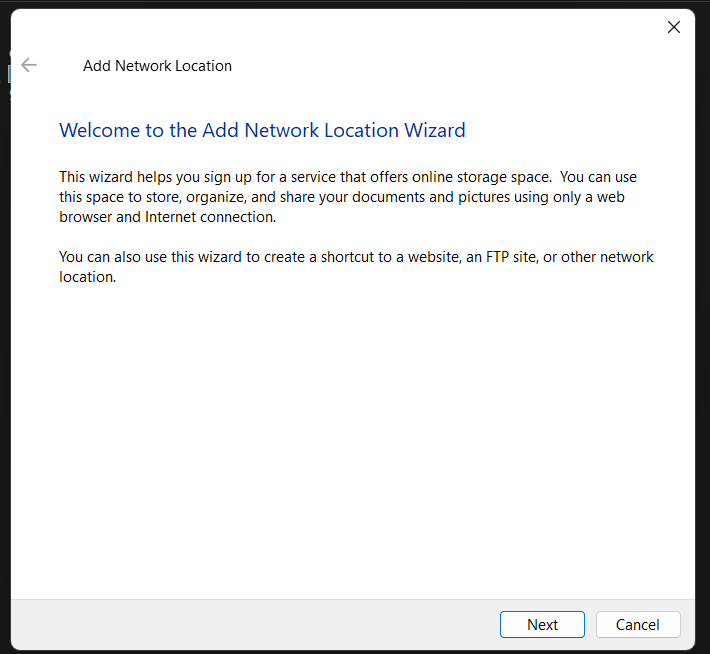
Windows Explorerand go toThis PC/My PC. Right click under theNetwork Locationsand selectAdd a Network Location. Now selectChoose Custom Location. Click onNEXT
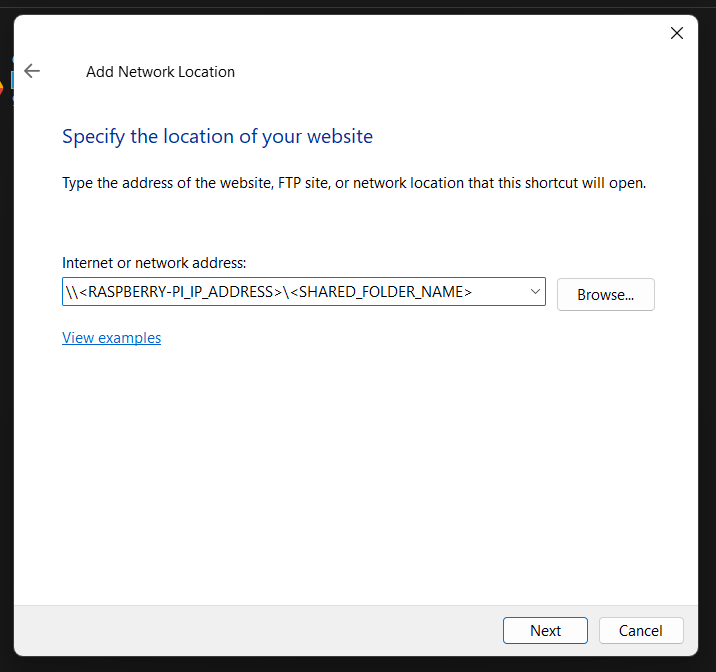
- Enter the following command replacing
<RASPBERRYPI_IP_ADDRESS>and<SHARED_FOLDER_NAME>with your Pi's details. Example is given below:
\\192.168.1.1\Nasty
Click on next
- This should take you to a login screen. Enter the username and passowrd as set in
Step-7in the last section ofOpenMediaVault Setupand you should be good to go.
- Open your
-
Plex Media Server SETUP:
- Login into your Raspberry Pi via
SSHas shown above, and execute the following commands
sudo nala install apt-transport-https -y
- Now we add the
Plex Repository
 curl https://downloads.plex.tv/plex-keys/PlexSign.key | sudo apt-key add -

 echo deb https://downloads.plex.tv/repo/deb public main | sudo tee /etc/apt/sources.list.d/plexmediaserver.list

 sudo nala update
- Install
Plex. You might get some questions that you can answer accordingly, or else keep itNo.
sudo nala install plexmediaserver
- Open your Web Browser and search for
<IP_ADDRESS_OF_PI>:32400/web. This should open the Plex web. You can create a free account and you can add yourMoviesfolder fromNasty.
- Login into your Raspberry Pi via
-
Hotspot SETUP:
- To enable use
Hotspotwith your Raspberry Pi, run thesetup_hotspot.shscript, after making the script executable. Run the following commands in the Raspberry Pi terminal (or with the SSH)
 cd './Portable Raspberry-Pi NAS/setup_hotspot.sh'
 chmod +x setup_hotspot.sh
 sudo ./setup_hotspot.sh
- To enable use
-
Congratulations🎉
You have completed the Raspberry-Pi NAS Setup. Now you can access the hard drive contents from any device that is on the same network. You can also access the Plex Media Server on your phone with the Plex app (it's free).

- Expand storage capacity with additional drives.
- Integrate with cloud services for remote access.
- Implement security features like password protection and encrypted storage.
- Making it a private server.
Enjoy with your Portable Raspberry-Pi NAS! 😄